How to use Logo Manager?
Step 1:
Log in to your ThemeForest account and navigate to the “Download” tab. Locate your purchased Resellpress theme.
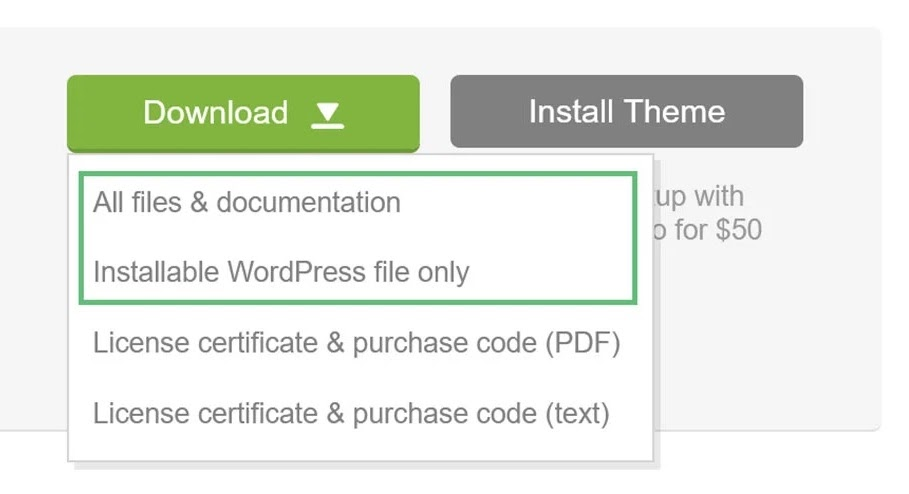
Step 2:
Upon clicking the Download button, you have the option to select either the Installable WordPress file only, containing the theme’s WordPress installable files, or opt for the All Files & Documentation, comprising the complete Resellpress Theme Package.
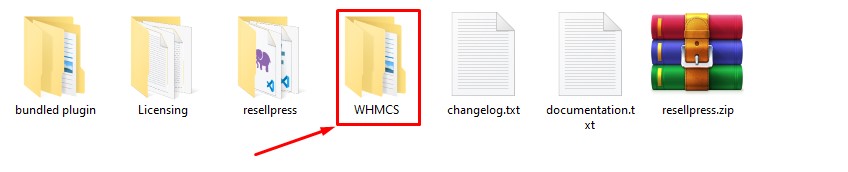
Step 3:
Navigate to Resellpress Theme folder > WHMCS folder.
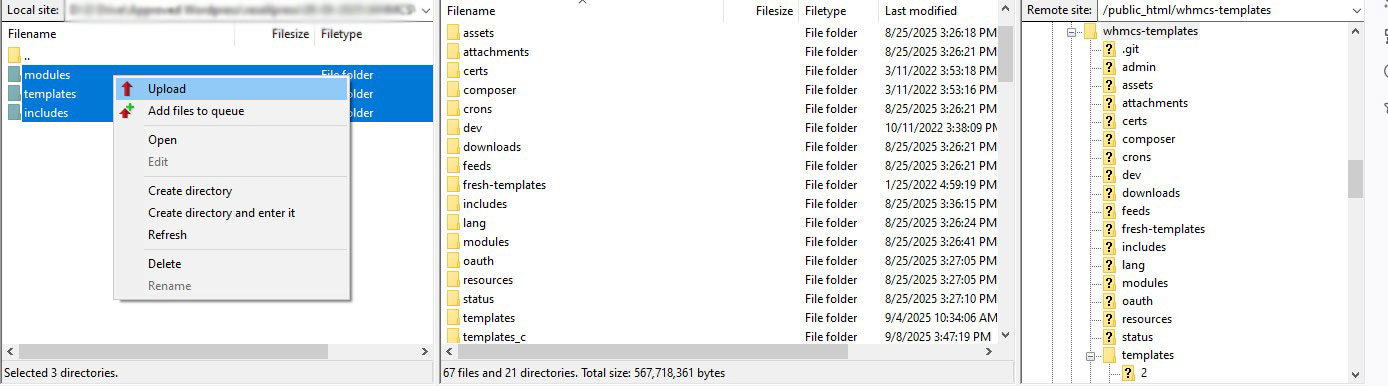
Step 4:
Upload the files present in WHMCS Folder to your WHMCS installation directory.
Step 5:
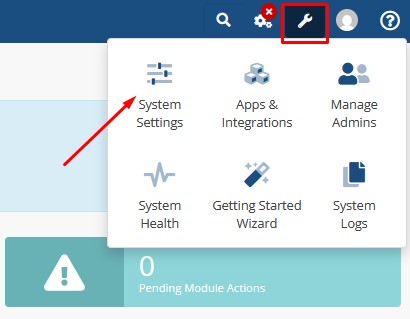
Login to your WHMCS admin. Hover over wrench icon at top right and go to System Settings.
Step 6:
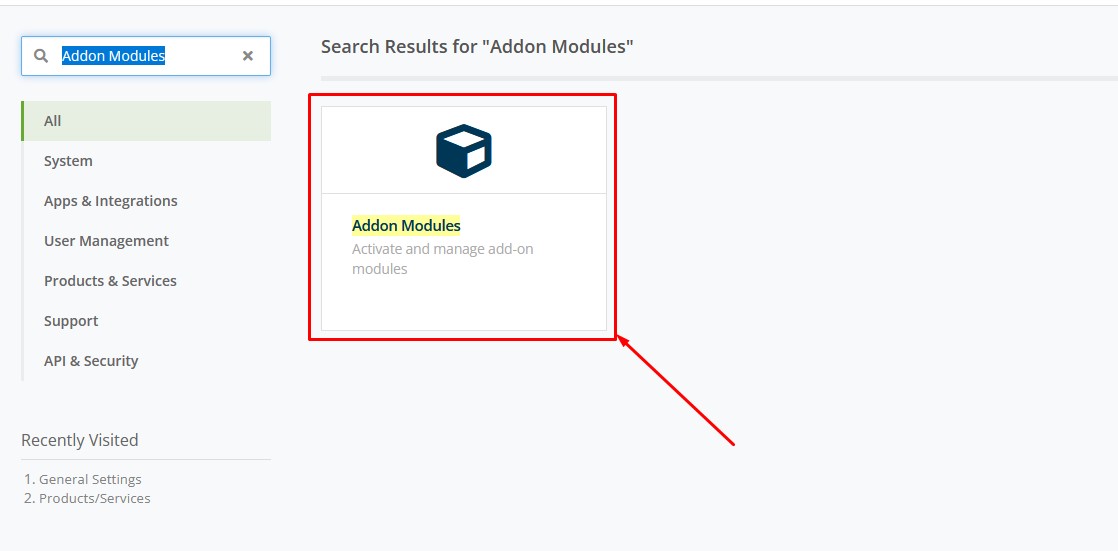
Search for “Addon Modules” and click on it.
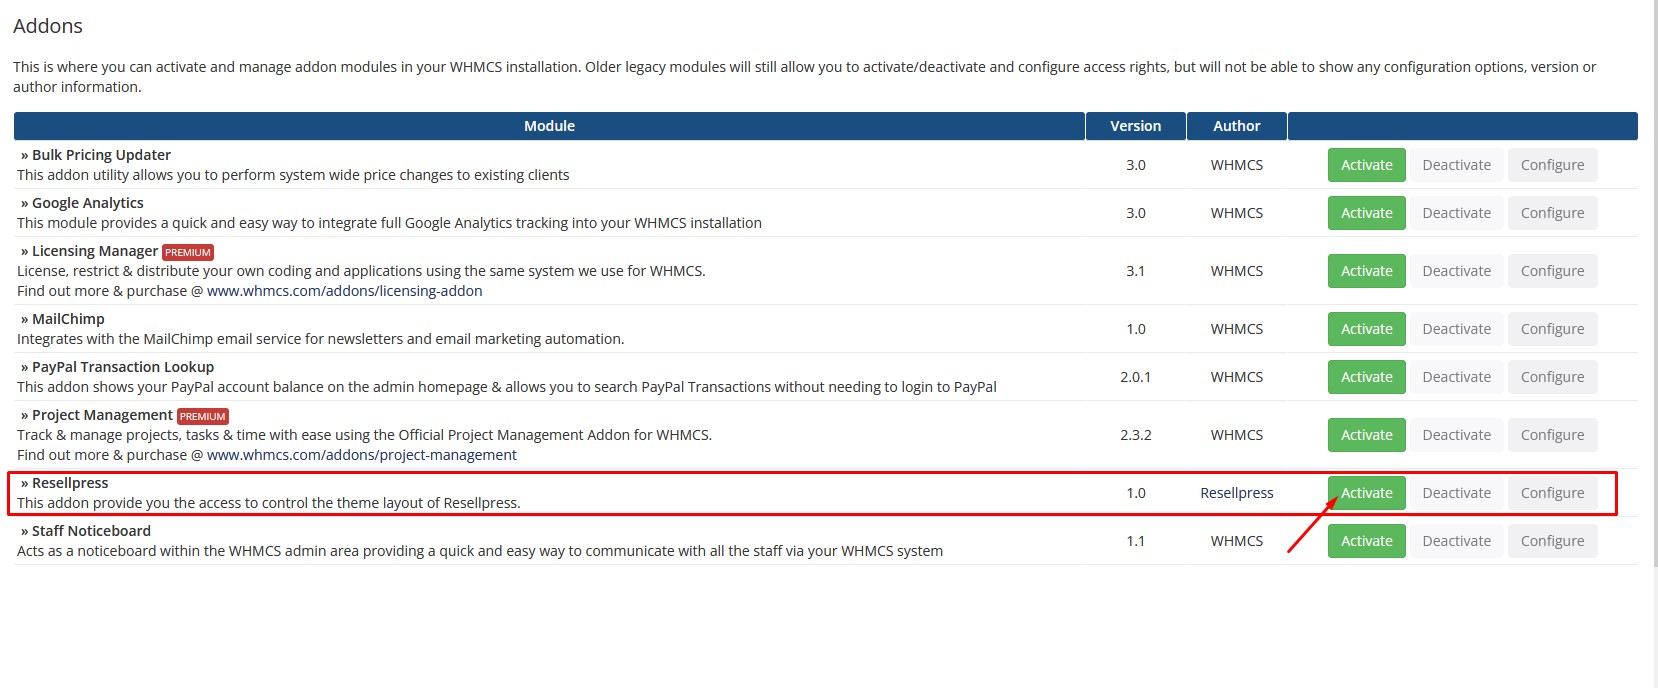
Look for “Resellpress” and activate it.
Step 8:
Click on “Configure”.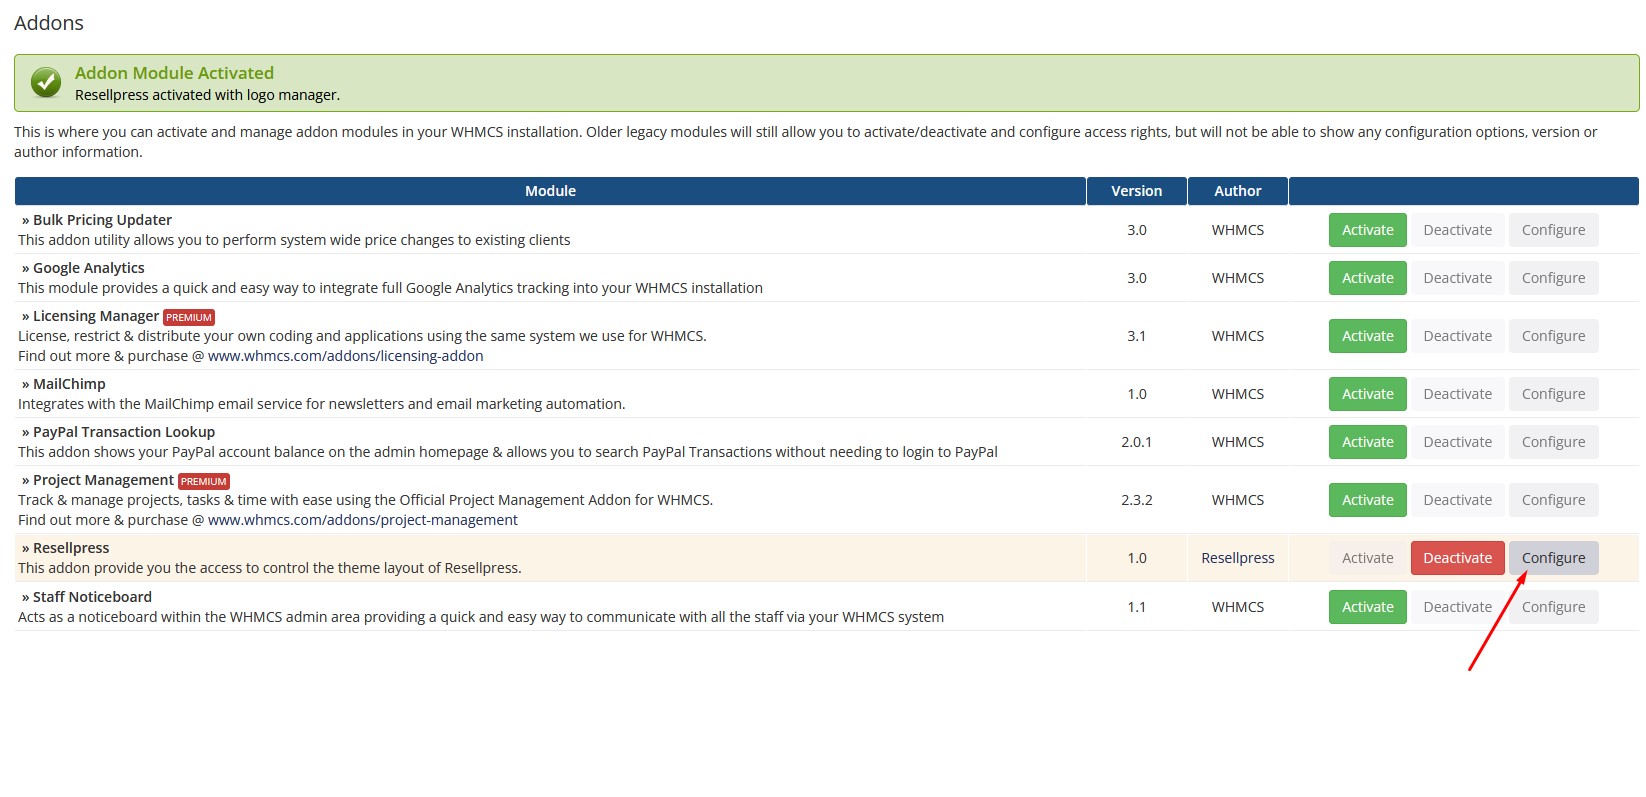
Step 9:
Check the check boxes to allow the module access and click on “Save Changes”.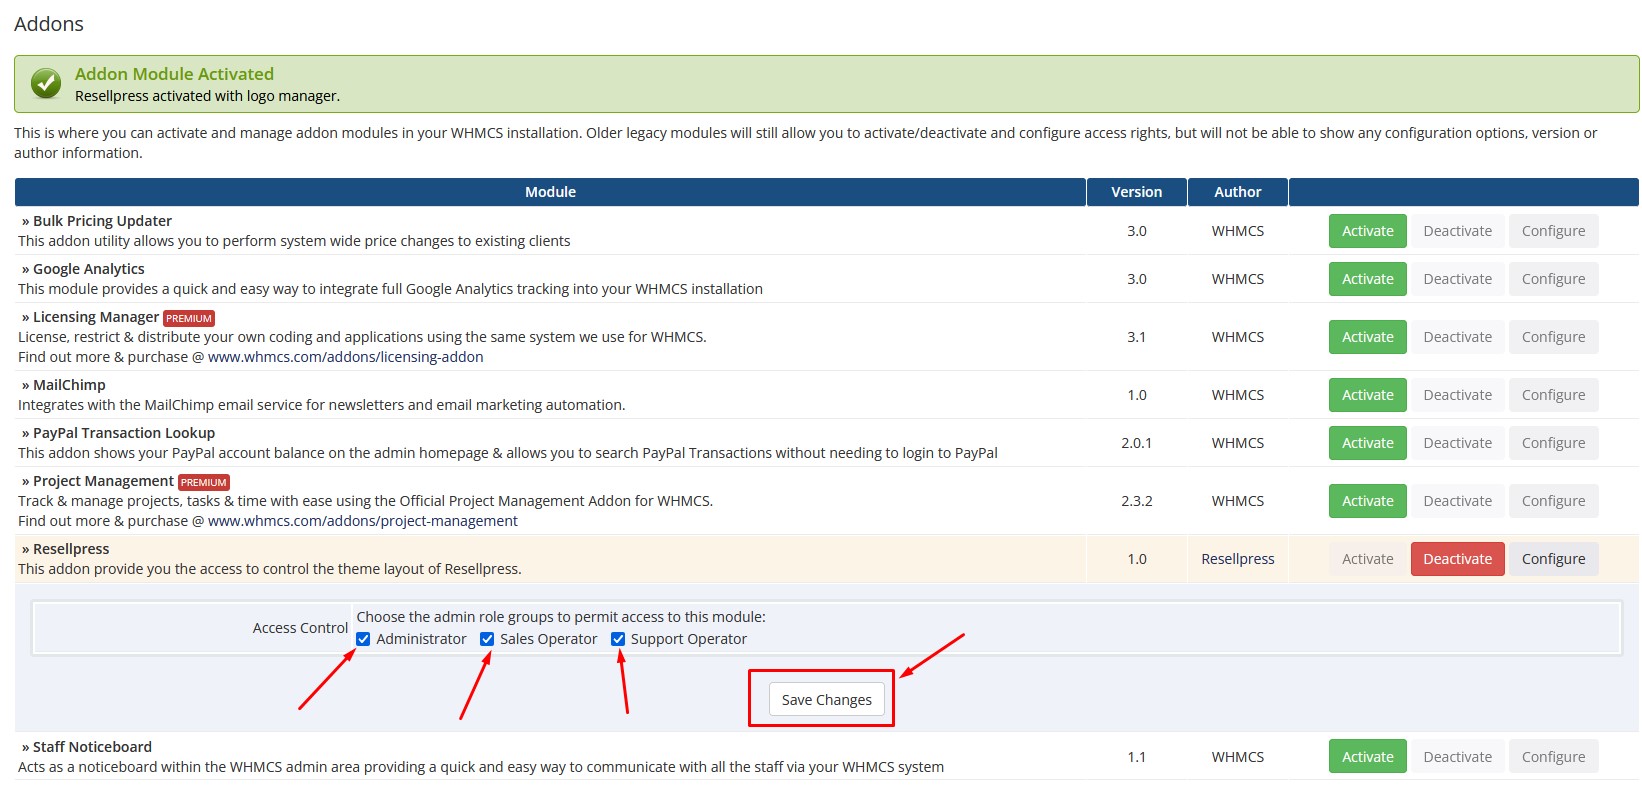
Step 10:
Hover over “Addons” and Open “Resellpress”. 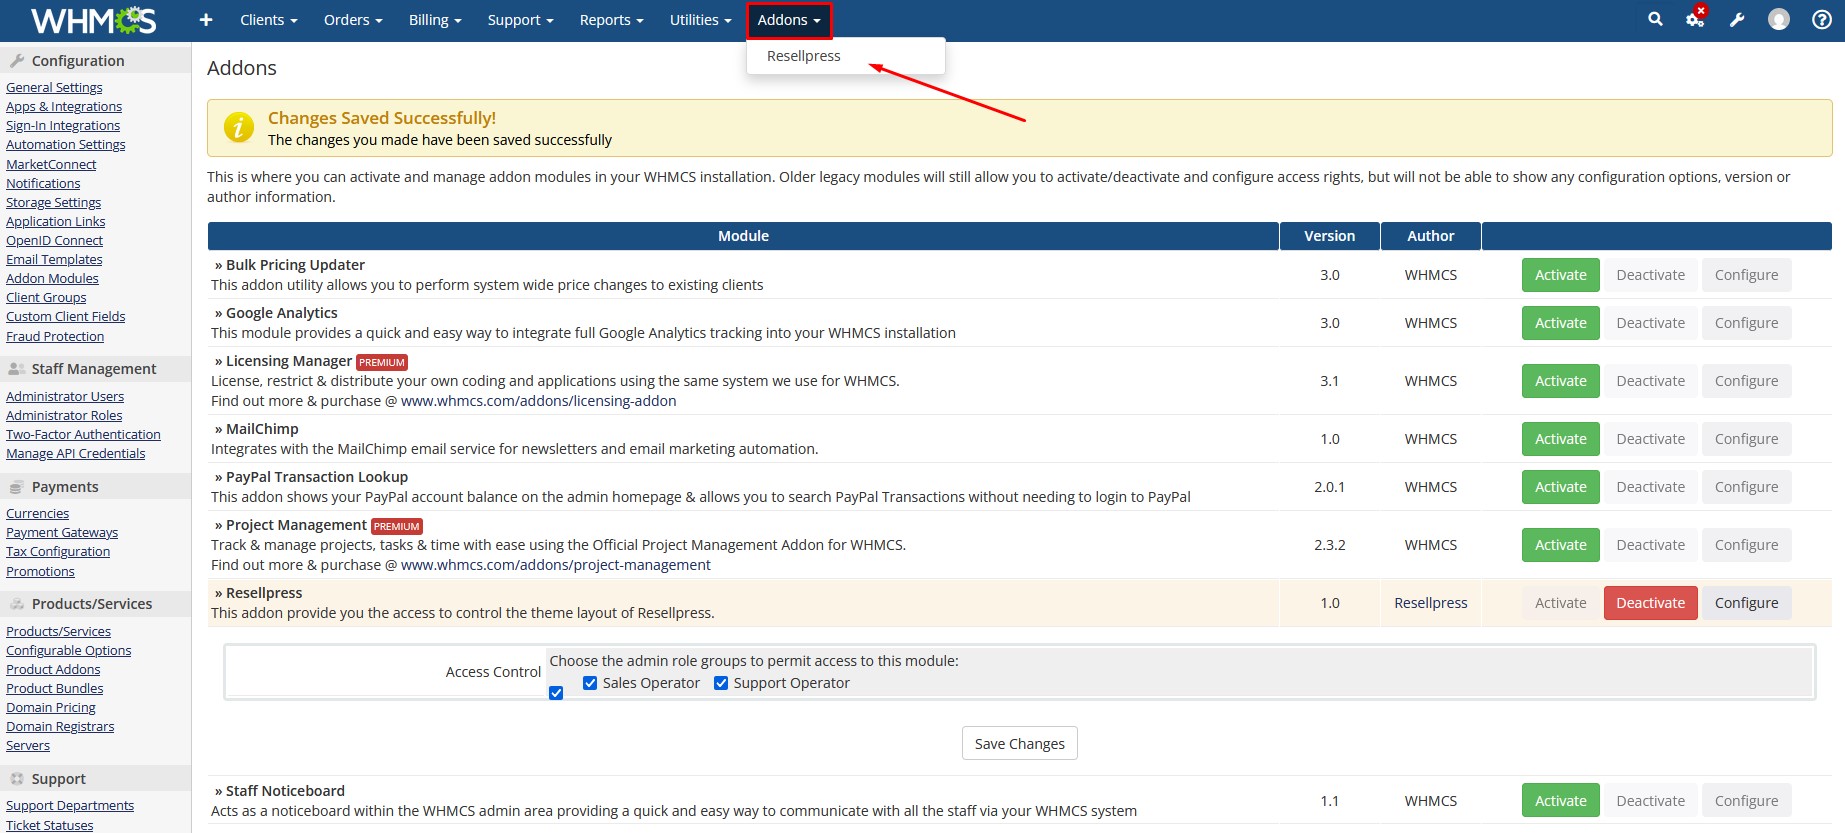
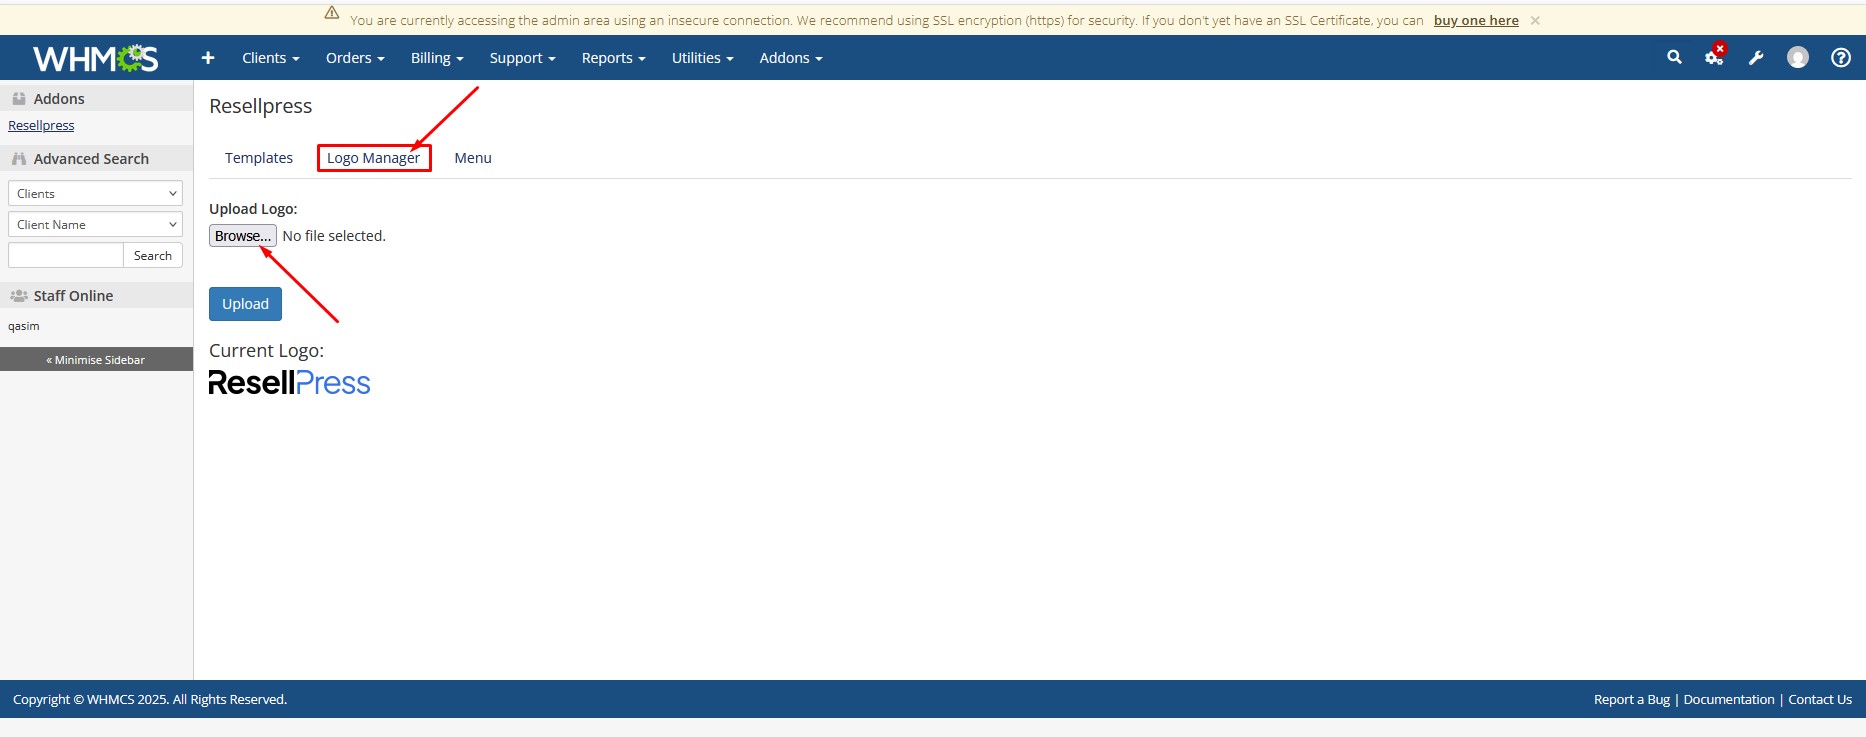
Step 11:
Click on your “Logo Manager” choose your Logo and click on “Upload Button”.